


The construction process that the South brothers developed is unusual. After the foundation is in place, the outer layer of the dome (the airform) goes up first, and is "inflated" with a fan that runs non-stop for days or weeks, until the foam, rebar and concrete are installed inside it. An airlock is built into the airform, so that you can go in and out without deflating it. The remainder of the shell is built from inside the airform, where the workers are shielded from the weather. This is another reason this type of building makes sense for Seattle.
There were 34 participants in my workshop; with that large of a group we were split into two teams, and each team had a dome to work on. Before we arrived the MDI construction crew poured the foundations of both domes, then attached and inflated the airforms. We were working on 20' diameter domes, which MDI has found to be a great way to provide affordable housing. They have built dozens of them in the Italy area, and rent them out under hotel rules, so that the residents can pay on a weekly basis and don't need to provide security deposits in advance.
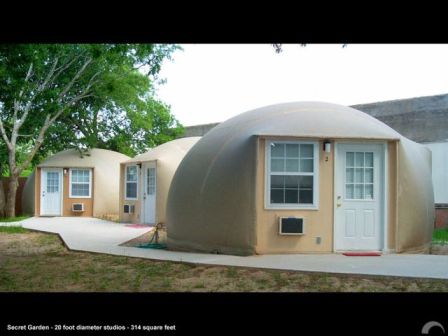
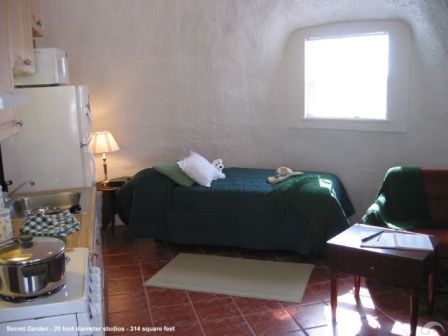
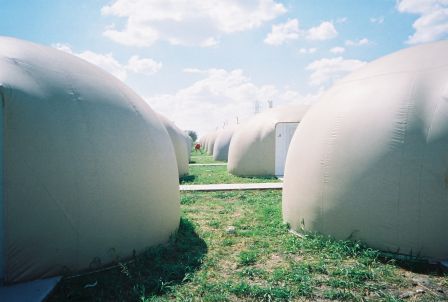
Here's a photo of some typical 20' domes, which provide 314 square feet of living space. There's no bedroom, just the living/kitchen area, the bathroom, and a closet. To provide enough space for a small bedroom, the domes would need to be at least 24 feet in diameter.
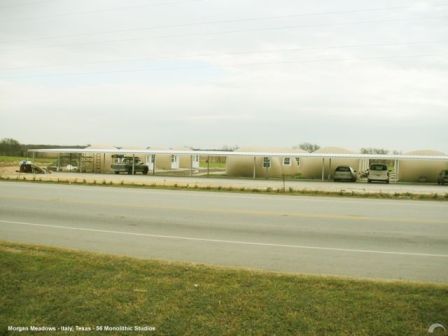
The two domes that we worked on were at the north end of Morgan Meadows, the biggest group of MDI's rental domes. There are dozens of units there, and a covered parking area for the residents.
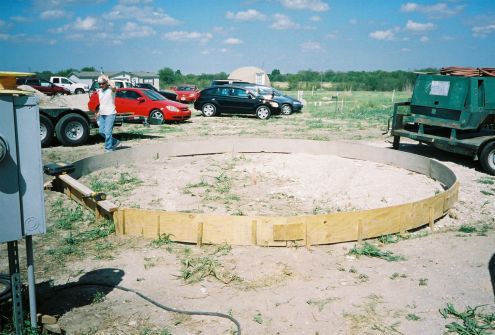
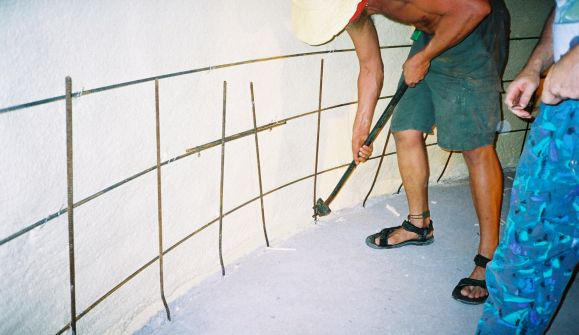
The first step in the process is the foundation, which is built in the usual way except that it's round and has a row of rebar sticking straight up around the perimeter.
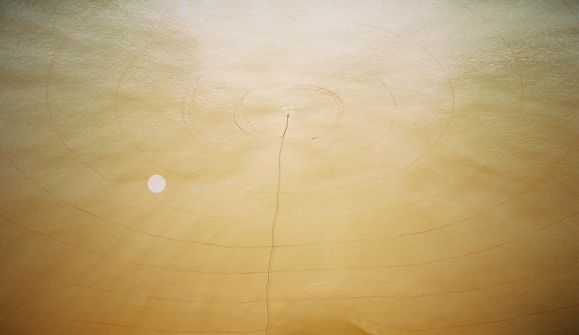
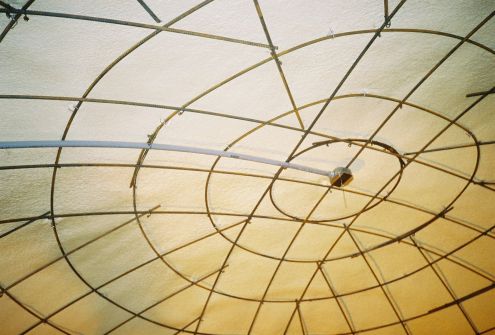
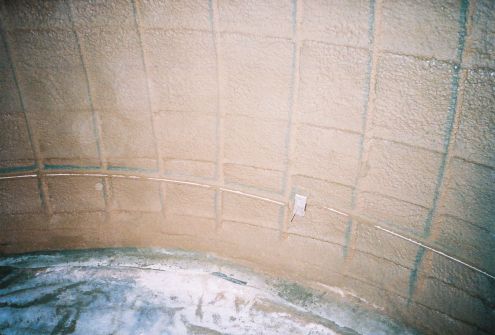
After the foundation is complete, the airform is attached and inflated. Here's a photo that shows the inflated airform with its built-in airlock.
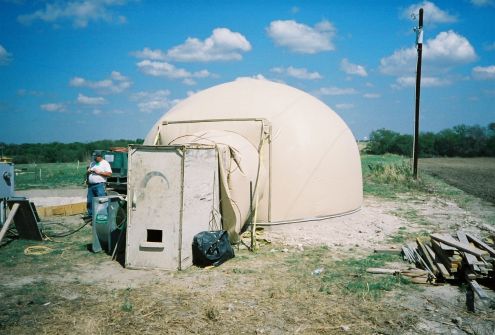
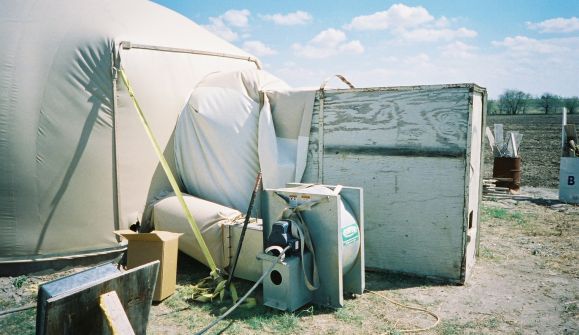
Next to the airlock there's a fan that inflates the airform.
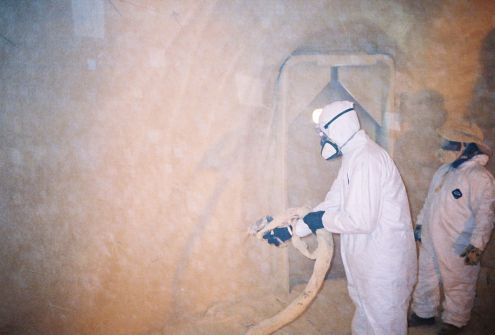
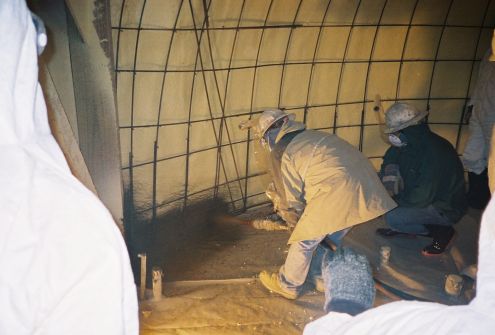
Now we suit up, go inside and start spraying the urethane foam; it takes quite a few applications to get about three inches in place.
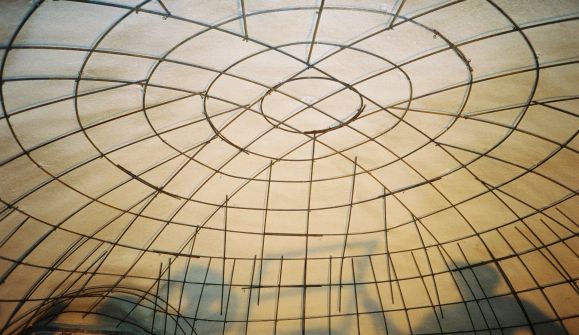
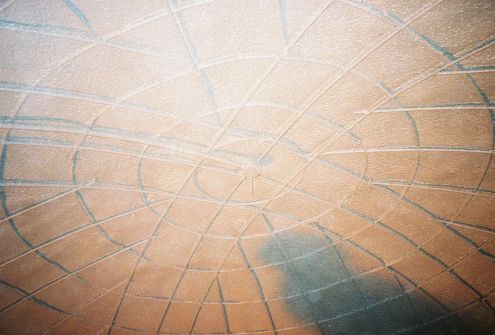
When the foam is nearly complete, it's time to mark the rebar locations, at about 1-foot intervals.
Then the rebar hangers are pressed into place (they have barbed ends). That tube you see toward the center is a piece of conduit that is being used to press the hangers into place.

After spraying a thin layer of foam over the rebar hangers, it's time to start installing the rebar. The rebar can be bent by hand, and it is attached to the hangers by bending the wire that is part of the hanger, and by adding pre-formed wire connectors with loops at both ends. A special hand tool is used to quickly attach those wire connectors.

At the base, the rebars that are sticking up out of the foundation are tied into the rebars inside the airform. That's why it's called a "monolithic" dome; when the concrete is added the foundation and dome are all one assembly. That's what gives this type of construction its earthquake / tornado / hurricane resistance.
Here's the completed rebar installation, ready for the concrete to be sprayed on top (once the electrical conduits are installed). Note the added reinforcing bars around the door opening. Skylights are often added to larger domes.
Next the electrical conduit is installed (plastic conduit & metal outlet boxes).
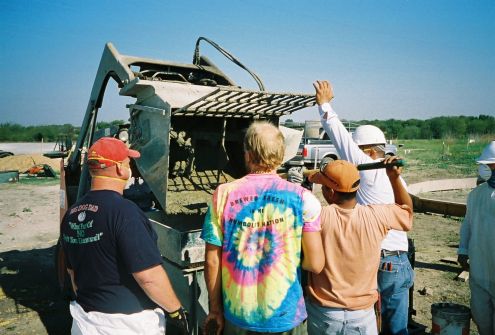
After concrete is mixed in a mixing attachment on the Bobcat, it is poured into the hopper of the concrete pump.
Here's the beginning of the concrete spraying. Like the foam, it's sprayed in layers until it is about three inches thick. The concrete has to be mixed to the correct consistency, and the spraying technique is important. Note the clever MDI invention; a plastic wrap dispenser attached to the hardhat, so the operator can clear away the overspray that would be constantly collecting on safety glasses.
At this point a few layers of concrete have been applied.
After each layer of concrete is sprayed, the overspray on the foundation is removed. Also the concrete is removed from the covers of the electrical outlet boxes.
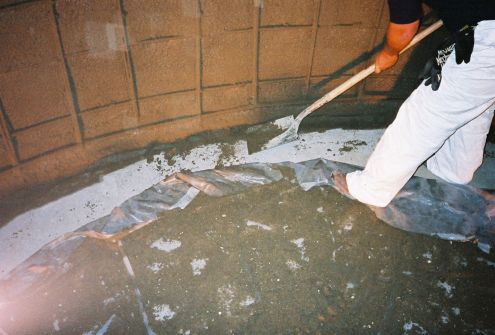
Here's a shot with more concrete applied.
Once the concrete completely covers the rebar, the shell is complete. When the concrete has cured the fan can be turned off. The doors and windows are added and the interior finishing can begin. An experienced crew of five workers can build the shells of four of these 20 foot domes in a week!
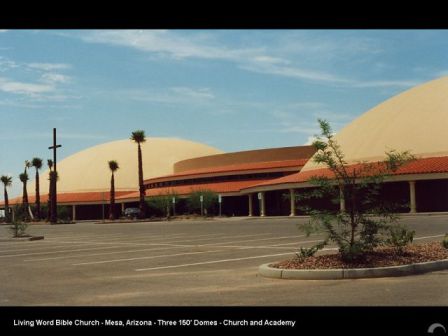
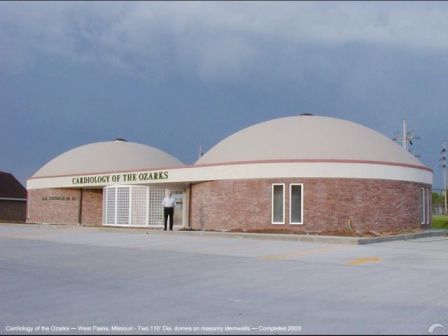
This same technique has been used to build some very impressive dome homes, some as large as three stories tall, with many thousands of square feet of living space.